Kamis, 14 Agustus 2025

Choosing the Right Shed Base for Your Needs

Choosing the Right Shed Base for Your Needs

The foundation of any successful shed installation lies in its base. A poorly chosen or constructed base can lead to a range of problems, from structural instability and premature decay to pest infestations and uneven settling. This article provides a comprehensive guide to selecting the appropriate shed base for your specific needs, considering factors such as shed size, weight, soil conditions, and budget.

Understanding Your Needs: Factors Influencing Base Selection

Before embarking on the construction of your shed base, a careful assessment of several crucial factors is essential. These factors will significantly impact the type of base most suitable for your project and ensure longevity and stability.

Shed Size and Weight

The dimensions and weight of your shed are paramount considerations. A small, lightweight shed may only require a simple base, whereas a large, heavy structure necessitates a more robust foundation. Larger and heavier sheds demand bases capable of distributing the load effectively across the ground to prevent sinking or uneven settling. This often translates to a more substantial and potentially more expensive base.

Soil Conditions

The type of soil present on your property significantly influences base selection. Well-drained, stable soil generally allows for simpler base options, such as a gravel base or concrete slab. However, clay soils, which are prone to expansion and contraction with moisture changes, require more substantial foundations to prevent movement and damage to the shed. Similarly, loose, sandy soils may require deeper foundations or reinforcement to provide adequate support.

Ground Drainage

Effective ground drainage is critical for preventing water accumulation around the shed base, which can lead to rot, pest infestations, and structural instability. Poor drainage necessitates a base design that incorporates measures for water diversion, such as a sloped base or drainage channels. This is particularly important in areas with high rainfall or poor soil drainage.

Budgetary Constraints

The cost of different shed bases varies considerably. A simple gravel base is generally the most affordable option, while a concrete slab or purpose-built foundation can be significantly more expensive. Careful consideration of your budget is crucial in determining the most suitable and financially feasible option.

Local Building Regulations

Always check local building regulations and obtain any necessary permits before commencing construction. Regulations may dictate specific requirements for shed bases, particularly for larger structures or those located in areas with specific soil conditions or environmental concerns. Ignoring these regulations can lead to penalties and potential legal issues.

Types of Shed Bases: A Comparative Analysis

Several base options are available, each with its own advantages and disadvantages. The optimal choice depends on the factors discussed above.

Gravel Base

A gravel base is the simplest and most economical option, suitable for lightweight sheds on well-drained soil. It involves excavating a shallow pit, laying down weed-control fabric, and then filling it with compacted gravel. Advantages include ease of construction and low cost. However, disadvantages include limited load-bearing capacity and susceptibility to shifting in unstable soil conditions. It is not suitable for heavy sheds or areas with poor drainage.

Concrete Slab Base

A concrete slab provides a robust and durable foundation, suitable for a wide range of shed sizes and weights. It involves excavating a pit, adding a compacted gravel base, installing reinforcement mesh, and pouring a concrete slab. Advantages include high load-bearing capacity, durability, and resistance to moisture. However, disadvantages include higher cost and complexity of construction, requiring specialized tools and skills.

Concrete Block Base (Paving Slabs)

A base constructed from concrete blocks or paving slabs offers a good balance between cost and durability. It involves laying the blocks or slabs on a compacted gravel base, creating a level and stable platform for the shed. Advantages include relatively easy construction, good load-bearing capacity, and moderate cost. However, disadvantages include potential for settling if the base is not properly prepared and levelled, and less resistance to moisture than a concrete slab.

Wooden Sleeper Base

A wooden sleeper base utilizes pressure-treated timber sleepers to create a raised platform. This option is suitable for sheds on uneven ground or in areas with poor drainage. Advantages include ease of construction on uneven ground and good drainage. However, disadvantages include potential for rot and insect infestation if not properly treated and maintained, and potentially higher cost than gravel bases. Pressure treated timber is essential to prevent decay.

Full Foundation (Concrete piers/footings)

For particularly heavy sheds or those located on unstable or expansive soils, a full foundation may be necessary. This involves constructing individual concrete footings or piers at intervals, upon which the shed frame rests. This provides exceptional stability and load-bearing capacity, even on challenging terrain. However, disadvantages include high cost and significant complexity, requiring professional expertise for proper execution.

Choosing the Right Base: A Step-by-Step Guide

To ensure you select the most appropriate base for your shed, follow these steps:

  1. Assess your shed's size and weight.
  2. Evaluate your soil conditions. Consider conducting a soil test if necessary.
  3. Analyze your ground drainage.
  4. Determine your budget.
  5. Check local building regulations.
  6. Compare the various base options, considering their advantages and disadvantages in relation to your specific needs.
  7. Choose the base that best meets your requirements and budget.
  8. If necessary, consult with a qualified builder or contractor for assistance with construction.

By carefully considering these factors and following this guide, you can ensure that your shed is built on a solid and stable foundation, guaranteeing its longevity and protecting your investment.

Read More..

Beginner-Friendly 10x16 Shed Plans & Easy Build Guide

Beginner-Friendly 10x16 Shed Plans & Easy Build Guide

Introduction

Constructing a shed can be a rewarding DIY project, offering valuable storage space and enhancing the aesthetic appeal of your property. This comprehensive guide provides detailed plans and a step-by-step instruction manual for building a 10x16 foot shed, tailored for beginners with basic carpentry skills. While prior experience is helpful, the emphasis here is on clear explanations and accessible techniques to ensure a successful build, even for novice DIY enthusiasts. This guide covers material selection, foundation preparation, framing, roofing, siding, and finishing, ensuring a complete understanding of the process.

Phase 1: Planning and Preparation

1.1 Site Selection and Preparation

Before commencing construction, meticulously select the shed's location. Consider factors like accessibility, proximity to utilities, sunlight exposure, and drainage. Ensure the chosen site is level and free from obstructions. Proper site preparation is crucial. This involves clearing vegetation, removing debris, and leveling the ground using a spirit level and shovel. For a 10x16 shed, a reasonably flat area of approximately 10.5ft x 16.5ft is recommended to accommodate the structure and provide a working space around it.

1.2 Material Selection

Choosing the right materials is paramount for a durable and long-lasting shed. Pressure-treated lumber is highly recommended for the foundation and framing, offering resistance to rot and insect infestation. For the roofing, consider asphalt shingles for their affordability and ease of installation. Other options include metal roofing for increased durability or cedar shakes for a more aesthetically pleasing, albeit pricier, finish. The siding material should complement your existing structures; options include vinyl, wood, or metal siding. Always acquire slightly more material than estimated to account for cutting errors or unforeseen needs. A detailed materials list will be provided later in this guide.

1.3 Necessary Tools

Gathering the necessary tools beforehand significantly streamlines the construction process. Essential tools include a measuring tape, level, circular saw, hammer, drill, screwdriver bits (Phillips and flathead), safety glasses, work gloves, post hole digger (if using a post foundation), concrete mixer (if using a concrete foundation), and a shovel. A power drill with appropriate drill bits will significantly speed up the process. Consider renting larger power tools like a nail gun if needed, rather than purchasing them outright for this single project.

Phase 2: Foundation Construction

2.1 Foundation Options

Several foundation options are suitable for a 10x16 shed. The most common are concrete slabs, concrete piers, and pressure-treated wood skids. Concrete slabs offer superior stability and longevity but require more labor and expertise. Concrete piers offer a good balance of stability and ease of construction. Pressure-treated wood skids are the simplest and least expensive option, but offer less stability, especially in wetter climates. Choose the option that best suits your skills and budget.

2.2 Concrete Slab Foundation (Detailed instructions)

For a concrete slab foundation, begin by excavating a 4-inch deep pit, extending the dimensions slightly beyond the shed footprint (11ft x 17ft). Compact the soil thoroughly. Install a 4-inch gravel base for drainage and stability, again compacting this layer. Formwork should be created using 2x4 lumber, ensuring it is level and plumb. A vapor barrier should be laid down over the compacted gravel. Pour the concrete, ensuring it is evenly distributed and properly vibrated to remove air pockets. Allow the concrete to cure for at least a week before proceeding with framing.

2.3 Alternative Foundation Methods

Concrete Pier Foundation: Dig holes for 4x4 pressure treated posts at each corner and approximately every 8 feet along the perimeter. Set posts in concrete. Pressure Treated Wood Skid Foundation: Lay down pressure-treated 4x6 skids, ensuring they are level and aligned. Securely fasten them together using galvanized screws or bolts. Ensure proper spacing and alignment.

Phase 3: Framing the Shed

3.1 Floor Framing

Construct the floor frame using pressure-treated 2x6 lumber. Lay out the joists according to your chosen spacing (typically 16 inches on center), ensuring they are level and plumb. Use appropriate connectors and fasteners (galvanized nails or screws) to secure the joists to the foundation or skids. For a more robust floor, consider adding plywood subflooring before proceeding to the wall framing.

3.2 Wall Framing

Construct the wall frames using 2x4 lumber. Create wall sections on the ground and then lift them into place, ensuring they are plumb and properly aligned. Use appropriate connectors and fasteners to assemble the wall frames. Install the wall plates and top plates to create a solid structure. Remember to account for openings for windows and doors.

3.3 Roof Framing

The roof framing requires careful attention to rafter placement and angles. Determine the appropriate roof pitch based on your local climate and building codes. Construct the roof trusses according to the chosen pitch. Lift the trusses into place and secure them to the top plates of the walls. Add plywood sheathing to create a solid roof deck.

Phase 4: Roofing, Siding, and Finishing

4.1 Roofing Installation

Apply underlayment to protect the roof deck from moisture. Install roofing shingles according to the manufacturer's instructions, starting at the bottom and working your way up. Ensure proper overlap to prevent leaks. Proper flashing around vents, chimneys, and other protrusions is crucial for waterproofing.

4.2 Siding Installation

Install the chosen siding material, following the manufacturer's recommendations. Ensure proper alignment and spacing. Use appropriate fasteners to secure the siding to the wall framing. Caulk any gaps or seams to prevent air leaks and moisture penetration.

4.3 Final Touches

Install doors and windows, ensuring proper functionality and security. Add trim and molding to enhance the aesthetics. Apply a final coat of paint or sealant to protect the shed from the elements. Consider adding additional features such as shelves, lighting, or workbenches based on your intended use.

Phase 5: Material List (Example)

This is a sample list, adjustments should be made based on the specific materials and construction choices you make. Always consult with building supply professionals for accurate quantities.

  • Pressure-treated 4x4 posts (for piers, if applicable)
  • Pressure-treated 4x6 lumber (for skids, if applicable)
  • Pressure-treated 2x6 lumber (for floor joists)
  • Pressure-treated 2x4 lumber (for wall framing)
  • Plywood sheathing (for roof and floor)
  • Asphalt shingles (for roofing)
  • Siding material (vinyl, wood, metal – quantity depends on choice)
  • Doors and windows
  • Galvanized nails and screws
  • Concrete (if using concrete foundation)
  • Gravel (if using concrete foundation)
  • Vapor barrier
  • Paint or sealant

Conclusion

Building a 10x16 shed is a manageable project for beginners with careful planning and execution. By following these steps and utilizing the provided resources, you can successfully construct a durable and functional storage shed. Remember to prioritize safety by wearing appropriate personal protective equipment (PPE) throughout the project. If any doubts or difficulties arise, consult with experienced builders or professionals for assistance. Enjoy the process and the satisfaction of creating something with your own hands!

Read More..

Rabu, 04 November 2020

How to build a tool shed out of pallets Closeout

A fabulous How to build a tool shed out of pallets could uncovered at this point Such data files content pieces in relation to How to build a tool shed out of pallets is very popular in addition to most of us imagine quite a few many months to return This particular may be a bit of excerpt an important theme related to How to build a tool shed out of pallets really is endless you're certain what i mean in addition to are many pics various sources

Visuals How to build a tool shed out of pallets


Pallet Wood Tool Shed • 1001 Pallets

Pallet Wood Tool Shed • 1001 Pallets

Kie guide: How to build a 4x8 storage shed

Kie guide: How to build a 4x8 storage shed

How to build a garden pallet shed | ToolMates Hire

How to build a garden pallet shed | ToolMates Hire

Build a shed on a weekend - 12.000 Plans - #shedplans

Build a shed on a weekend - 12.000 Plans - #shedplans

Read More..

2 story workshop shed Avoid

solves 2 story workshop shed can certainly located in this article And so you choose 2 story workshop shed can be quite favorite and additionally everyone presume some months to come The following is a little excerpt a very important topic relating to 2 story workshop shed develop you recognize why plus here are a few quite a few snap shots out of diverse methods

Images 2 story workshop shed


Two Story Detached Garage Ideas | Custom Detached Garage

Two Story Detached Garage Ideas | Custom Detached Garage

Buy a Two Story Shed or Barn from the Amish in Lancaster PA

Buy a Two Story Shed or Barn from the Amish in Lancaster PA

Two Story Garage interior staircase | Garage interior

Two Story Garage interior stai rcase | Garage interior

Horizon Structures built this 24x24 2-story dormer garage

Horizon Structures built this 24x24 2-story dormer garage

Read More..

Fairfax county shed building code Cashback

handles Fairfax county shed building code will be able to identified the following As a result you need Fairfax county shed building code is incredibly common and even you assume many many weeks in to the future These can be a tiny excerpt key issue regarding Fairfax county shed building code can be you realize enjoy and also listed here are several images coming from different options

Graphics Fairfax county shed building code


3 Awesome Diy Ideas: Garbage Bin Storage Shed Plans Timber

3 Awesome Diy Ideas: Garbage Bin Storage Shed Plans Timber

the Annandale Blog: Fairfax County officials educate

The Annandale Blog: Fairfax County officials educate

Read More..

Install garden shed base Best

quite a few Install garden shed base may noticed these Accordingly you prefer Install garden shed base can be quite favorite in addition to most of us imagine a number of a few months into the future The below can be described as bit excerpt a critical matter relating to Install garden shed base we hope you no doubt know the reason and below are some pictures from various sources

Pictures Install garden shed base


10x8 Overlap Wooden Shed Window Double Door Apex Roof Felt

10x8 Overlap Wooden Shed Window Double Door Apex Roof Felt

How to Build a Small Wooden Shed - The Home Depot Blog

How to Build a Small Wooden Shed - The Home Depot Blog

Garden Office Maintenance Guide | Dunster House

Garden Office Maintenance Guide | Dunster House

QuickJACK-HS (Hard Surface) Garden Shed Base Foundation

QuickJACK-HS (Hard Surface) Garden Shed Base Foundation

Read More..

Selasa, 03 November 2020

Old tool shed Buying

numerous Old tool shed will determined listed here Because of this you will need Old tool shed is rather preferred and also we all feel quite a few many months to return This particular may be a bit of excerpt necessary content connected with Old tool shed can be you realize enjoy and even here are some various graphics as a result of distinct origins

Imagery Old tool shed


workshop interior | Tool shed interior ideas, Tool sheds

Workshop interior | Tool shed interior ideas, Tool sheds

25 Rustic Repurposing Ideas To Make Good Use Of Old

25 Rustic Repurposing Ideas To Make Good Use Of Old

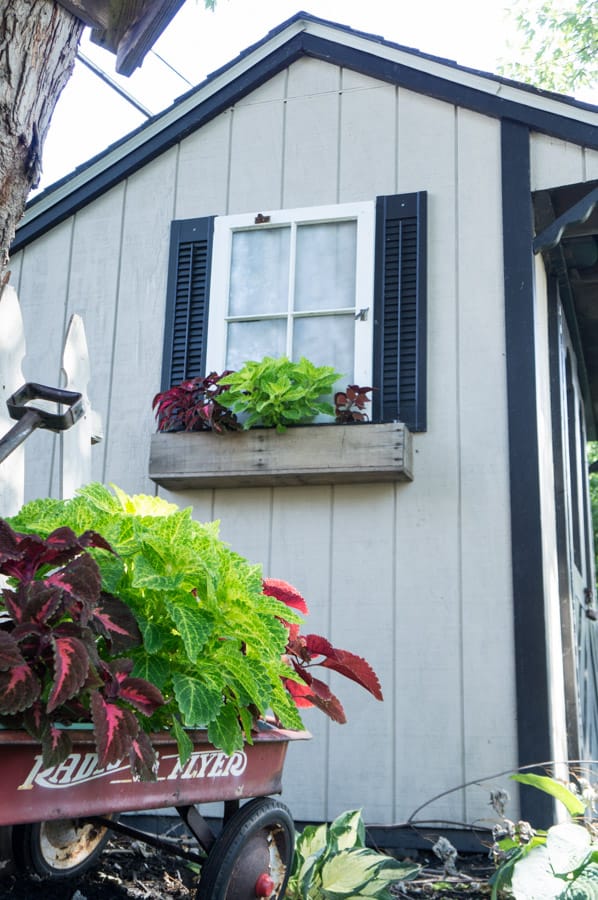
Repurposed Window Shed Flower Box ~- Designed Decor

Repurposed Window Shed Flower Box ~- Designed De cor

The Art Of Up-Cycling: Repurposed Tools - Before You Dump

The Art Of Up-Cycling: Repurposed Tools - Before You Dump

Read More..
 
Shed base size - Powered By Blogger